©2004-2008 Vicki Designs All Rights Reserved
INTARSIA
Intarsia is when you knit a 'picture' or design into a garment. When first presenting a new color, tie a slip knot with the new color around the working color and snug it up next to the needle and continue knitting with the new color. When picking up a new color already added, wrap the yarns around each other so that you don't have any holes. You do this by picking up the new color up under the dropped color thereby wrapping them. Make sure you slighty tug the yarn in place so that it is snug and the stitches are uniform.
Before you start, you may wind your yarn onto small bobbins or you may just add the color in long manageable lengths and run your fingers through them when they tangle (as they will do with the twisting of the colors). The bobbins sometimes take longer to untangle for me and so I use the long strand method. Experiment to see which is right for you. Do not stretch the yarn across the back of the knitting. I have a 3 stitch rule. If the color is needed more than 3 stitches across or up..I add a new strand. . If you stretch yarn across the back, you will get a puckered look to the design. You wil have lots of ends to work in, but working the ends in will also help tighten up any loose stitches. Pictures and Video provided below.
FIG1 Changing color in a Knit Row
Knit with yarn A until you want to change. Pull yarn A over to the left and bring yarn B up under A as you knit the next stitch.
FIG 2 Changing color on a Purl Row
Purl with yarn A until you come to the color change. Pull yarn A over to left and wrap yarn B under A as you bring it across to purl the next stitch.
Notice in Fig 2 that where the colors meet resembles a sideways knitted row as on each row you cross the yarns over. Tug slightly on your yarn at your color changes to keep the tension uniform. If the yarn is loose in some places, tighten with a crochet hook and when you weave in your ends under the loose stitches, it will hold the tension. You can work your ends in with a crochet hook under the nub of the purls on the backside of your work or you can thread a yarn needle and work them under. A crochet hook is my choice.
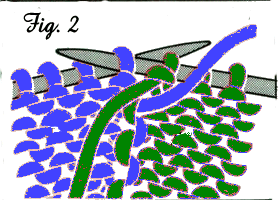
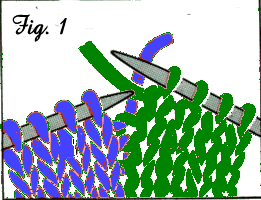
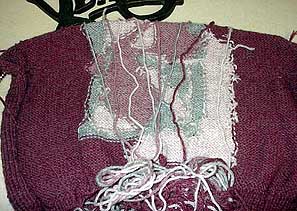
Fig 3: Back view of a work in progress. I have the strands bundled on the sweater for the photo..but as I knit they would be hanging long in the back of my work.

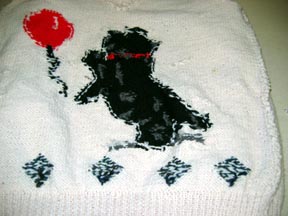
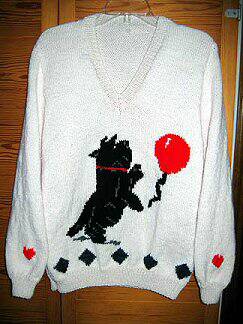
Fig 4: Front and back side of intarsia sweater. Notice that the back of work is very tidy after the ends have been worked in.

Videos for PERSONAL INFORMATION only. Do not link to these videos nor use them in any other manner without permission from Vicki Meldrum